Verify your email
Hi Johny, to view the full content, please verify your email address by clicking the link sent to youremail@gmail.com
Resend Verification Email
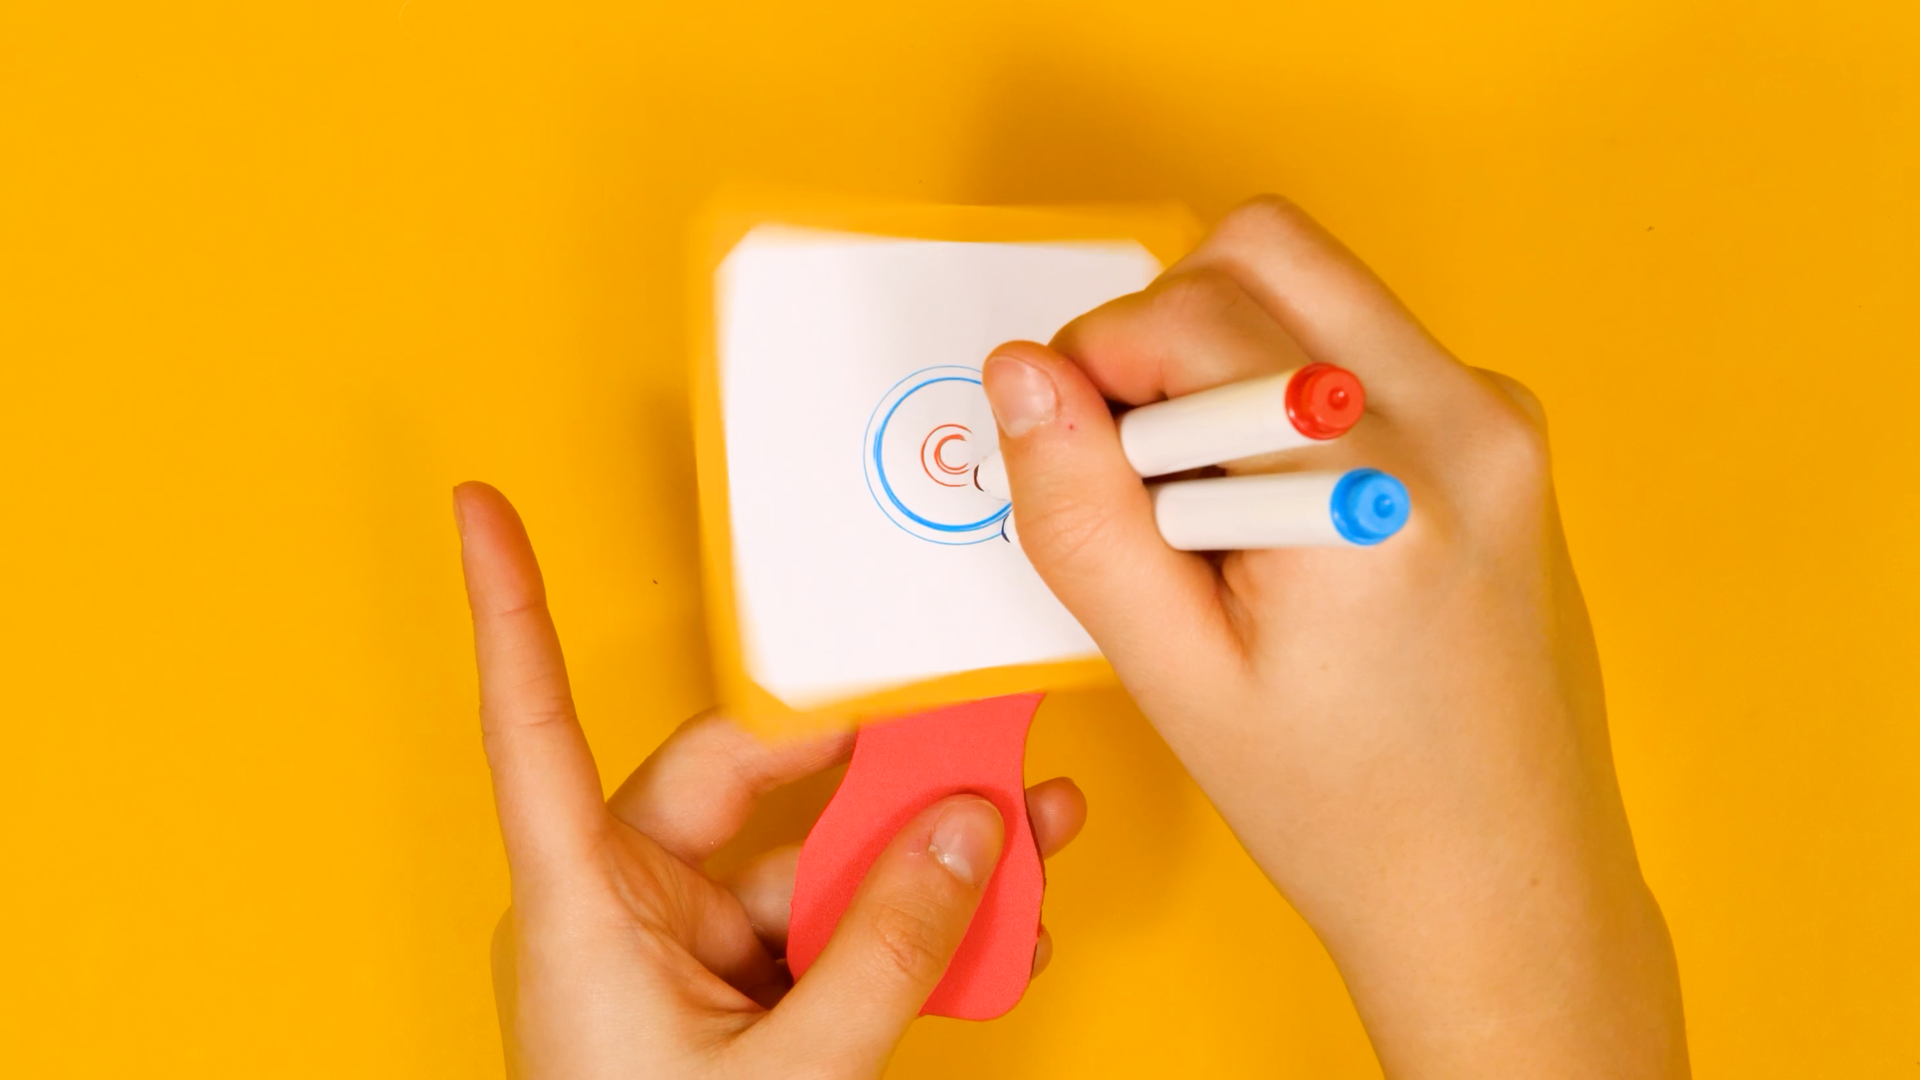
Draw hypnotic, colorful spirals with a spring-driven drawing machine. Learners assemble a wind-up mechanism inside a foam handle, press a platform onto the top, then let stored spring energy spin a marker-touched sticky note into a perfect spiral. Every wind becomes a new drawing, and overlapping spirals reveal hypnotic Moiré patterns. This Spark turns potential and kinetic energy into generative spin art. You don't draw the picture, you build the machine that draws it.
Get the materials that pair with this educator guide.
Get the materials that pair with this educator guide.
Quick Start gets the main resources in hand. The guide below helps with the decisions that happen before, during, and after students build.
What students build and how the activity works.
Prep questions and pro tips.
Classroom sequence and prompts.
Learning goals and curriculum connections.
Fixes, adaptations, and extensions.
Hypnotizers are fully self-contained drawing machines powered by elastic potential energy. Each learner receives a foam handle, a square foam platform, a wind-up mechanism with an internal spring and gear train, a pad of sticky notes, a set of markers, and an instruction sheet - everything needed to make spin art right out of the bag, with no extra supplies required.
The build runs nine steps: learners explore the kit, insert the wind-up mechanism into the foam handle, press the platform onto the wind-up connector, practice the wind-release technique, attach a sticky note, draw their first spiral, layer a second color over the first, reposition the paper off-center to discover Moiré patterns, then iterate across a gallery of designs. Along the way learners feel elastic potential energy store in a tightening spring and watch it release as kinetic energy the moment the platform is free to spin.
Everything you need is already in the Spark bag. No scissors, no tape, no extra paper - the adhesive sticky notes are the drawing surface and the markers are included. The only thing each learner needs is table space and a willingness to experiment.
Question: What do you notice about each piece of your Hypnotizer? What do you think each part will do?
Question: How can you fit the wind-up mechanism through the opening in the handle so it stays snug?
Question: Where does the square platform connect to the wind-up, and how hard do you think you need to press?
Question: What do you think will happen when you turn the knob? What will you feel as you keep turning?
Question: Which side of the sticky note goes down on the platform, and why does it matter?
Question: What do you think will happen when you touch a still marker to a spinning piece of paper?
Question: What do you think will happen if a second spiral is drawn on top of the first, in a different color?
Question: How will you make your next spiral different from your first? What variable will you change?
RI.K-2.7 – Use illustrations and words in a text to describe key ideas: Example: Learners use the Hypnotizer instruction sheet and slide deck illustrations to figure out where the wind-up mechanism goes into the foam handle and where the platform connects on top, combining pictures and short captions to understand a two-part assembly.
SL.K-2.1 – Participate in collaborative conversations: Example: Learners describe to a partner what happens when the platform is released - naming the wind-up, platform, and sticky note, and explaining in their own words what makes the spiral appear on the paper during the first drawing attempt.
RI.3-5.7 – Use information from illustrations and words to demonstrate understanding: Example: Learners use the slide deck's storing and releasing diagram to explain how winding the mechanism stores potential energy and how releasing it produces the spinning motion that draws the spiral - connecting a visual diagram to the physical experience of their own Hypnotizer.
SL.3-5.1 – Engage effectively in collaborative discussions: Example: Learners discuss how different sticky-note positions and wind amounts change the spirals in a small-group conversation after building their first gallery, building on each other's observations to predict what a new position or wind strength will produce.
RST.6-8.3 – Follow precisely a multistep procedure when carrying out experiments: Example: Learners follow the Hypnotizers build sequence precisely - inserting the mechanism before attaching the platform, winding with one finger holding the platform still, releasing before touching marker to paper - and understand that skipping or reordering steps means the machine won't spin or the spiral won't form.
SL.8.1 – Engage in a range of collaborative discussions with diverse partners: Example: Learners debate whether a fully wound Hypnotizer or a half-wound one produces a better spiral, each defending a position with evidence from their own gallery of test spirals - connecting observation, prediction, and the physics of stored spring energy.
K.G.A.2 – Correctly name shapes regardless of orientations or overall size: Example: Learners identify the circles that form when a still marker touches the spinning sticky note - noticing that no matter where they put the marker, the resulting shape is always a circle, because the paper is moving in a rotation under a stationary point.
1.G.A.2 – Compose two-dimensional shapes to create a composite shape: Example: Learners compose multiple spirals and circles into a layered composite shape on a single sticky note by drawing a second spiral on top of the first in a different color, observing how two simple shapes combine into a more complex pattern.
3.G.A.2 – Partition shapes into parts with equal areas: Example: Learners partition a circular spiral into equal angular wedges by drawing multiple radial lines outward from the center after the spiral forms, then describing each wedge as a fraction (¼, ⅙, 1/8) of the full circle traced by the marker.
4.G.A.3 – Recognize a line of symmetry for a two-dimensional figure: Example: Learners identify the line of symmetry in a centered spiral and compare it to an off-center spiral from the Moiré experiment, noticing that a centered spiral has many lines of symmetry while an off-center one has fewer - connecting sticky-note position to the geometry of the resulting shape.
6.RP.A.1 – Understand ratio concepts and use ratio reasoning: Example: Learners measure the number of winds versus the spin time of their Hypnotizer, expressing the relationship as a ratio (e.g., "six winds produces twelve seconds of spinning") and comparing ratios across different wind strengths to describe how stored energy scales with winding.
7.G.B.4 – Know the formulas for the area and circumference of a circle: Example: Learners measure the radius of their spiral with a ruler, then use πr² to estimate the area the marker covered and 2πr to estimate the path length of the outermost ring. Comparing two spirals - one small, one large - gives them a quantitative read on how much further the marker traveled in the larger one, connecting the machine's output to the real circle geometry they just traced.
K-PS2-1 – Motion and Stability: Forces and Interactions: Example: Learners feel how pushing and turning the wind-up knob stores energy and then observe how releasing the platform changes the motion of the sticky note - experiencing firsthand that pushes and pulls can start, stop, or change the motion of an object, and that the strength of the push (how many winds) changes the motion they produce.
K-2-ETS1-3 – Analyze data from tests of two objects to compare strengths and weaknesses: Example: Learners compare spirals made from different sticky-note positions and different marker colors, choosing which one they like best and explaining why - an informal engineering-design comparison where they test multiple solutions to the same challenge ("make a spiral") and describe what worked.
4-PS3-2 – Make observations to provide evidence that energy can be transferred: Example: Learners trace energy from their hand to the marker line on the sticky note - hand turns knob, knob tightens spring (elastic potential energy), spring releases and spins platform (kinetic energy), platform spins under marker to produce a visible spiral. They record this chain as evidence of energy transfer through a mechanical system.
3-5-ETS1-3 – Plan and carry out fair tests to identify failure points: Example: Learners systematically test why a Hypnotizer stops working by checking one variable at a time: is the wind-up mechanism centered in the handle? Is the platform fully seated on the connector? Is the sticky note pressed down firmly? Is the marker pressing too hard? They isolate the failure point and re-test, practicing structured troubleshooting.
MS-PS3-2 – Develop a model to describe potential energy stored by configuration: Example: Learners model the coiled spring inside the wind-up as an arrangement of atoms under mechanical tension. As the knob is turned, the spring's configuration changes (tighter coil, more internal stress), and potential energy is stored in that new arrangement. Releasing the platform lets the spring relax back toward its original configuration, converting the stored potential energy into kinetic energy. The Hypnotizer is a hand-sized proof that PE depends on how matter is arranged, not on motion itself.
MS-PS3-5 – Construct an argument about kinetic energy and energy transfer: Example: Learners argue from their Hypnotizer data that every visible spiral is evidence of energy transferred from the spring to the platform. Before release, the spring is loaded with elastic potential energy and the platform's kinetic energy is zero. After release, the platform has rotational kinetic energy and the spring is relaxed. The change in kinetic energy is exactly the energy transferred out of the spring - and the spiral on the paper is the visual trace of that transfer happening in real time.
This is the most common failure. The wind-up mechanism has slipped down through the handle, so the platform can't spin freely. Reposition the mechanism so it sits in the middle of the handle - it should fit snugly in the curved notch. If the issue keeps happening, check whether the learner is pressing too hard with the marker during drawing.
If the wind-up mechanism keeps pulling out of the foam handle when the learner tries to turn the knob, the foam may not be gripping it firmly enough. Have the learner hold the handle firmly around the mechanism while they turn - the extra pressure usually solves it. Make sure the mechanism is pushed all the way through to the curved notch, not halfway.
The adhesive edge wasn't pressed firmly enough. Peel the note, reposition it, and press the adhesive edge into the foam with a fingertip - really squeeze it. Test with a quick dry spin before drawing.
If the platform slows down or stops as soon as the marker touches it, the learner is pressing too hard. Coach them to rest the marker lightly - the paper should move under the marker, not be stopped by it. If pressing softly doesn't help, the wind-up may have slipped in the handle (see the first issue above).
Stop learners from forcing the knob past full resistance. The video script is explicit: "When you feel any resistance, stop!" Over-winding can break the internal spring and is one of the only ways to permanently damage a Hypnotizer. Coach the stop-at-resistance rule before the first wind-up attempt.
The learner is probably moving the marker too quickly across the paper, or the platform is running out of spin before the spiral forms. Coach them to move the marker very slowly - just a fingertip's width per second - and to let the platform do the work.