Verify your email
Hi Johny, to view the full content, please verify your email address by clicking the link sent to youremail@gmail.com
Resend Verification Email
Build ramps and pathways on a reconfigurable board so a ball rolls through a custom track to a final hoop. Then connect your maze to a partner's and extend the play. Learners use reverse engineering to design from the finish to the start, testing and adjusting ramps until the ball zigs, zags, and zooms into the hoop. The spark grows naturally from a solo build into a cooperative challenge where two or more boards become one shared path.
Get the materials that pair with this educator guide.
Get the materials that pair with this educator guide.
Quick Start gets the main resources in hand. The guide below helps with the decisions that happen before, during, and after students build.
What students build and how the activity works.
Prep questions and pro tips.
Classroom sequence and prompts.
Learning goals and curriculum connections.
Fixes, adaptations, and extensions.
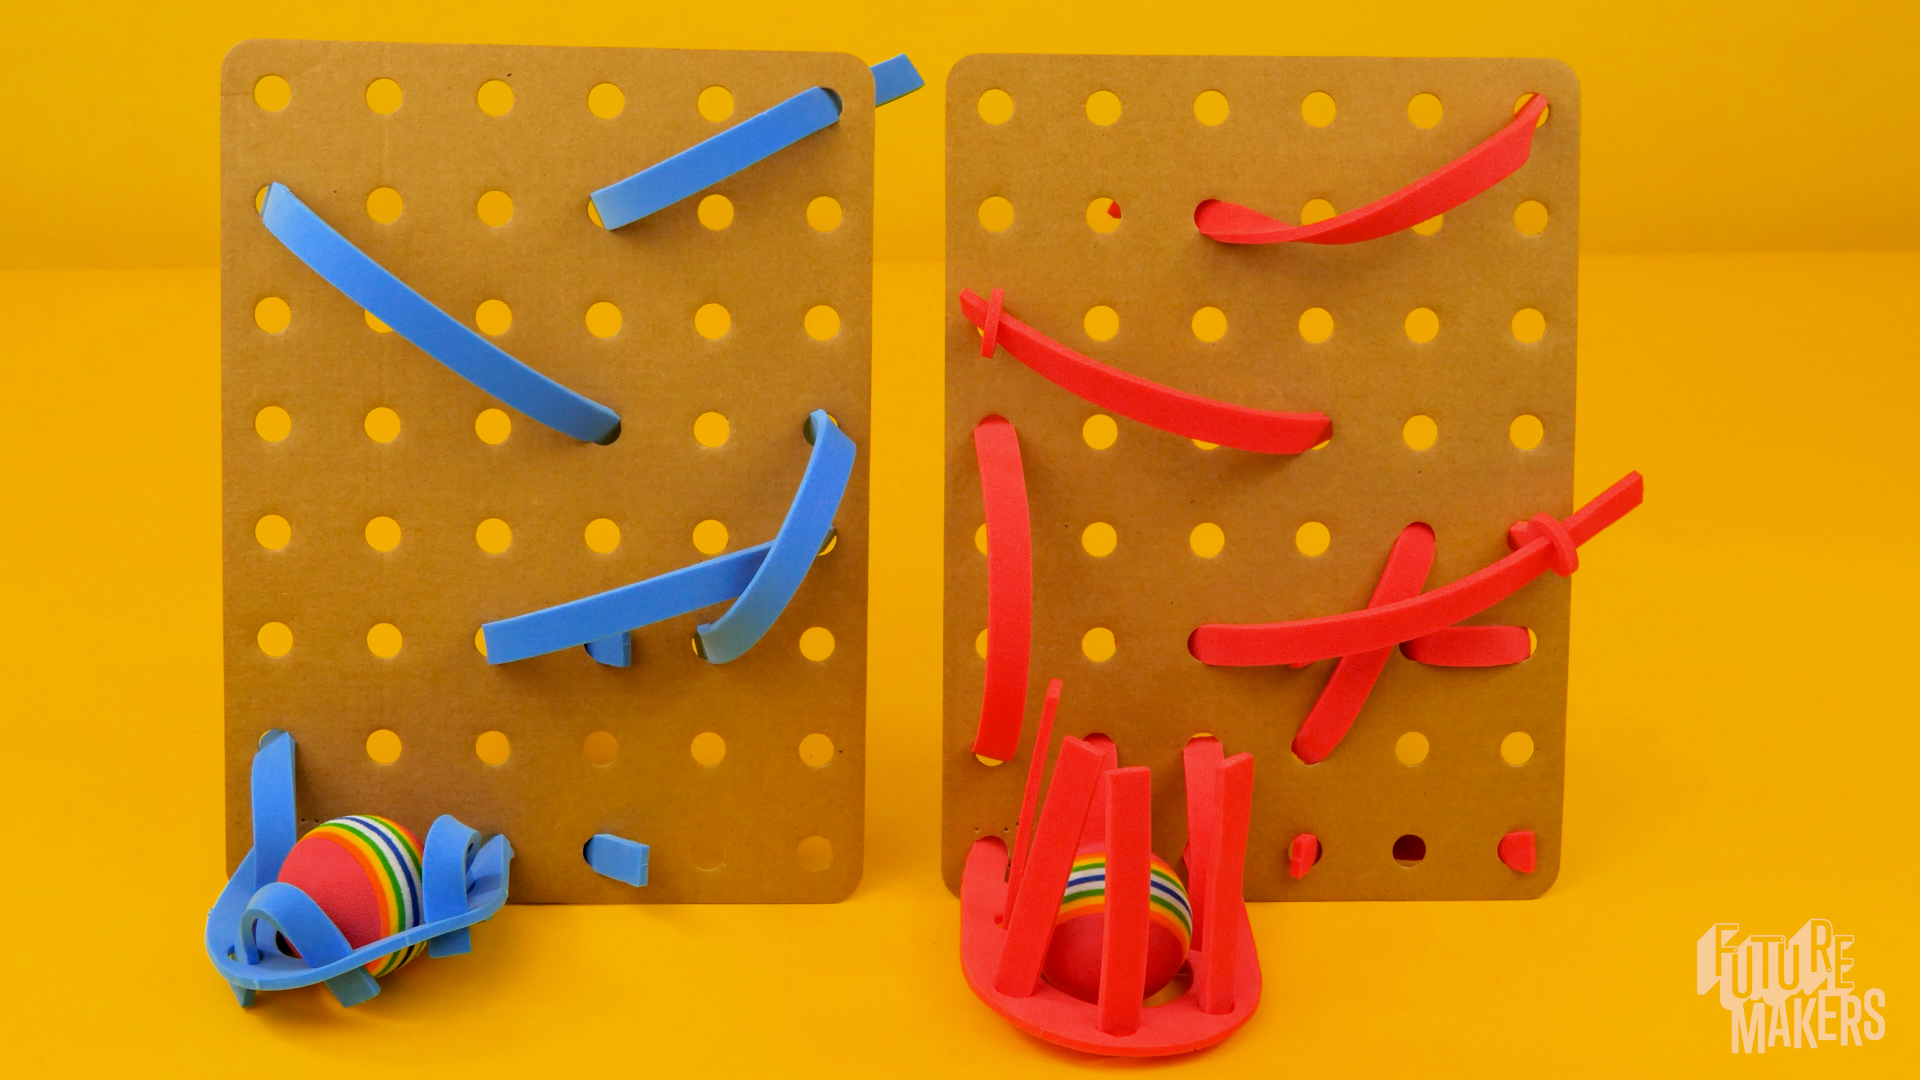
Mazes introduce learners to gravity, ramps, pathways, and reverse engineering through a hands-on design challenge. Each learner receives two die-cut cardboard wall boards, two sheets of die-cut foam components (ramps, stoppers, extenders, and a hoop piece), a lightweight ball, a cardboard triangle kickstand, an instruction sheet, and a reusable reclosable bag.
The build follows nine steps: learners explore and name their parts, prepare the boards and foam components, assemble a triangle stand so a board can stand upright, attach the hoop at the bottom, then add ramps and extenders working upward from the finish to the start. Testing happens at every stage - rolling the ball, adjusting ramp angles, and adding stoppers where the ball rolls off. When three ramps make a zig-zag-zoom path into the hoop, learners connect their boards with a partner so the hoop of one maze becomes the start of another. Extensions scale the cooperative challenge up to four-board pair builds and six-board whole-group mazes with a single ball traveling through every section.
Nothing. Everything learners need to build the Mazes Spark is included in the kit.
Question: What makes a ball roll downhill by itself? What do you think pulls it down?
Question: Why do you think the boards have holes all over them? What will the holes be used for?
Question: How many different shapes do you see in the foam sheets? How do you think each one will be used?
Question: How will you make the wall board stand upright by itself so a ball can roll down it?
Question: If the hoop is the finish line of your maze, where should it go on the board - the top, middle, or bottom?
Question: If the ball has to land in the hoop, how should you aim this first ramp?
Question: When you roll the ball from the top of this ramp, what happens? Does it land in the hoop?
Question: How many ramps do you need before the ball has enough room to really pick up speed?
Question: Now that your maze works, how would it change if you connected it to a partner's?
RI.K-2.7 – Use illustrations and words in a text to describe key ideas: Example: Learners read the Mazes instruction sheet and the slide-deck visuals to identify which foam pieces are "ramps," "stoppers," "extenders," and "hoop," using both the printed words and the labeled pictures to name each part before they start building.
SL.K-2.1 – Participate in collaborative conversations: Example: Learners explain to a partner where their hoop is and how the ball rolls into it, using vocabulary like "ramp," "hoop," and "gravity" as they show their maze, and take turns rolling the ball through each other's designs before deciding how to connect the two boards.
RI.3-5.3 – Explain relationships between events, concepts, or steps in a text: Example: Learners explain the cause-and-effect relationship between ramp angle and ball speed, describing how shifting the top end of a ramp by one hole changes whether the ball makes it into the hoop or rolls off the edge - tracing the reverse-engineering build sequence in the order it actually happened.
SL.3-5.1 – Engage effectively in collaborative discussions: Example: Learners negotiate where to connect their board to a partner's, discussing which hoop becomes the start of the next maze and what adjustments each of them needs to make so the ball passes cleanly from one board to the next without any adult intervention.
RST.6-8.3 – Follow a multistep procedure when carrying out experiments: Example: Learners follow the reverse-engineering sequence precisely - hoop at the bottom first, then one ramp, test, adjust, next ramp, test, adjust - understanding that the order matters because adding three ramps at once and then testing hides which ramp caused which failure.
SL.6-8.1 – Engage in collaborative discussions with diverse partners: Example: Learners negotiate a six-board combined maze with a team, debating how the ball should transition between each pair's section, arguing from evidence (the ball rolled off here, we adjusted and it worked) rather than preference, and building collective ownership of the shared path.
K.MD.A.1 – Describe measurable attributes of objects: Example: Learners compare the length of their ramps to the space between board holes, describing whether a ramp is long enough to span two, three, or four holes and how far its end sticks out - using "longer," "shorter," "higher," and "lower" to talk about how the ramp is positioned on the board.
K.G.A.1 – Describe objects using names of shapes and relative positions: Example: Learners identify the triangle kickstand as a triangle and describe spatial relationships during the build - "the hoop is at the bottom," "the ramp is above the hoop," "the extender is next to the ramp" - using positional language like above, below, next to, and between.
3.MD.B.4 – Generate measurement data by measuring lengths: Example: Learners test different ramp angles and record which angle drops the ball cleanly into the hoop versus which angle sends it off the edge, generating their own data on the relationship between steepness and ball path and making adjustments one hole at a time.
4.OA.C.5 – Generate and analyze patterns: Example: Learners notice the zig-zag-zoom pattern across three ramps and predict where the ball will travel next based on the angle of the ramp above it - recognizing that the whole path is made of one repeating rule: gravity always pulls the ball toward the next ramp below.
6.RP.A.3 – Use ratio and rate reasoning to solve real-world problems: Example: Learners reason about the ratio between ramp angle and ball speed in their maze - observing that a ramp tilted just a little steeper roughly doubles the ball's momentum into the next ramp - and use that rate reasoning to predict whether a new ramp angle will overshoot or undershoot the hoop.
6.EE.A.2 – Write, read, and evaluate expressions in which letters stand for numbers: Example: Learners describe the relationship between ramp angle and ball travel as an expression - if increasing ramp angle by one hole is a and the resulting change in ball distance is d, they reason about how a combined six-board maze becomes a chain of a-to-d relationships they have to tune in sequence.
K-PS2-1 – Motion and Stability: Forces and Interactions: Example: Learners explore how gravity pulls the ball down the ramps regardless of where they place the ball on the board - observing that a push is not needed, the ball rolls on its own because of an invisible force pulling it toward the ground, and noticing that steeper ramps make the ball move faster.
K-2-ETS1-2 – Engineering Design: Develop a simple sketch, drawing, or physical model: Example: Learners plan their maze by tracing a path with their finger on the board before adding any ramps, deciding where the hoop goes, where the first ramp enters, and how the ball will travel across the board - building a physical model of their design one ramp at a time and revising it when the ball misses.
3-PS2-1 – Forces and Interactions: Cause and Effect: Example: Learners investigate how ramp angle and stopper placement cause changes in the ball's path, testing a shallow ramp versus a steep ramp and observing the cause-and-effect link between how steep a ramp is and how quickly and where the ball exits into the next section of the maze.
3-5-ETS1-3 – Plan and carry out fair tests to identify failure points: Example: Learners systematically isolate which ramp is causing the ball to roll off by rolling the ball, watching exactly where it leaves the path, and changing only that one ramp's angle or adding a single stopper - fair-testing one variable at a time instead of rebuilding the whole maze.
MS-PS2-4 – Gravitational Interactions: Construct and present arguments using evidence: Example: Learners argue from evidence that gravity alone drives the ball through their maze, pointing to the fact that every ramp tilts downward, the ball never moves uphill without external force, and a flat ramp stops the ball completely - using their own build as the evidence for gravitational attraction.
MS-ETS1-3 – Analyze data from iterative tests to improve a solution: Example: Learners compare the performance of their first three-ramp maze against their iterated version, identifying which specific adjustments (ramp angle, extender position, stopper placement) improved the ball's path and which did not, then applying that pattern of improvement to the connection points in a pair or six-board combined maze.
When the ball keeps running off the side of a ramp, the ramp is either too steep, not threaded through the holes far enough, or there is no stopper to keep the ball on the path. Have learners adjust the ramp angle first, then add a stopper on the side where the ball escaped. Small adjustments make big differences - rebuild as little as possible.
If the ball reaches the hoop but bounces out instead of landing inside it, add a stopper at the hoop opening to absorb the bounce and keep the ball from rolling back out. This is a single-piece fix that learners can solve themselves.
If a ramp keeps popping out of the board holes, press one end a little further through the back so there is more length poking through. If the ramp is still loose, try a different hole position or swap in a shorter foam piece so the ramp fits more tightly.
The triangle kickstand is designed for one board at a time. When learners combine boards for a taller collaborative build, the stand alone won't hold it up. Have them lean the maze against a wall, a bookshelf, a book stack, or any vertical surface so the build stays upright while they test and iterate.
When the very first ramp above the hoop does not drop the ball cleanly into the hoop, learners often want to tear down the whole board. Instead, coach them to change only the angle of that one ramp - pull one end out by a single hole, test, and pull again. Reverse engineering is iterative; rebuilding resets progress.
Some learners will add three or four ramps in a row without testing the ball. Slow them down with a simple rule: after each new ramp, roll the ball. This catches design mistakes before they cascade through the whole build.
If a pair is struggling to connect their mazes, stop them before they argue about who's "right" and have each partner hand their board to the other to test. Watching a peer roll the ball through their design - without touching the build - usually unsticks the conversation faster than any adult intervention. This is the Pro Tip slide deck's most important prompt for cooperative groups.